I have set a lot of grommets and eyelets in my time. I mean, a LOT. I’ve done it with a hammer and set, I’ve done it with a grommet machine, once I even did it with a hairbrush and a pen. (Don’t.) I really thought I was out of new reasons to loathe setting grommets and eyelets. I was wrong. You’ve never properly hated an eyelet until you’ve hated a 1/8″ eyelet. They are, however, a reasonably necessary evil in doll clothes. Should you need to set them, here’s how….
Supplies:
- 1/8″ eyelets
- Setting die for 1/8″ eyelets
- Awl
- Size 8 knitting needle
- Baby anvil (not necessary, but helpful)
- Hammer. Smallish is ideal.
I would also strongly urge, as a precaution, that you do this in a room by yourself, where no one will be able to hear the screaming, stomping, profanity laden tantrum. But that might just be me….


Here’s where the foul language part of the project comes in. The awl itself is larger than the bore and barrel of the eyelet, so you’d *think* the eyelet would just pop in. It will not, because it takes approximately .2 seconds to pick up the eyelet but only .17 seconds for the hold to begin to heal as the threads relax back into their normal position. Now, there is technically an itsy-bitsy hole punch meant to be used in situations like this. I even have said tool. I can tell you from years and years of unfortunate experience that you do not want to cut threads to set an eyelet if you can possibly avoid it. Eyelets aren’t very strong, and will sometimes pull out. If you cut a hole in the fabric to set the darned things, you will most likely have to move up an eyelet size to get enough unmolested fabric for an eyelet to grab. I know we’re making doll clothes, but given the time it takes to make an teensy-weensy little fully boned bodice…. Let’s just say it’s an investment worth protecting.
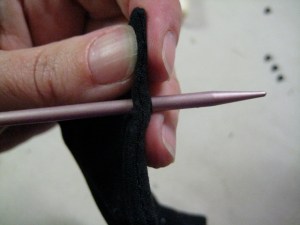
So, we make a hole with the awl, and then enlarge it with the size 8 needle. This will be difficult and annoying, but not impossible. We now have a hole that will take a full quarter of a second to become too small, which should give us adequate time to pick up the eyelet and drop it into the hole. If you can pick up that teeny little eyelet and drop it straight down into that rapidly closing hole. (This took me about three tries per eyelet.)


One of two things will happen at this point: the eyelet will fall out, or the back layer of fabric will work loose and forget that it ever had a hole in. If the eyelet falls out, return to the step with the knitting needle and try again. If the back layer of fabric forgets its hole, return to the step with the awl and try again.

By this point, you should be developing a vicious cramp in your thumb, which will cause your hand to twitch. The eyelet will come slightly out. You save it, mostly, except for how the back layer has worked loose and magically forgotten that it ever had a hole in. Return to step 2. Do not pass go, do not collect 500$, go directly to step 2.
If, by some miracle, you get the eyelet properly upside-down on the anvil (or other similarly hard surface) and there’s only a little thread or two of the back layer desperately trying to spider-web across and seal the breach, you can use your awl to nudge it back where it belongs. Just be careful not to move any of the fingers holding the eyelet and fabric in place, or the threadsies, sensing your diversion, will attack full force to seal that hold.
With your free hands, grab the setting die and the hammer.

Yelling “Take that, you stupid little piece of &*@$ing metal!” is, strictly speaking, optional.


I put the awl almost entirely through my thumb, right next to the nail, during the tenth eyelet. My mother has suggested that, given that I’m prone to being myself, I should probably keep my awl sitting in a jar of rubbing alcohol when not in use….
She’s not wrong.

you may want to look into the washers for this size. yes they do make them. I know they come in silver, I think they come in gold too.
This is hysterical! But, your directions are very clear and most helpful, especially for someone who has been avoiding eyelets like the plague. I’m happy to have stumbled upon this. Thanks!
Glad it helped, Chris! Go forth, and fear not the eyelet…
Excellent, after all these years! I was just looking on ebay for some miniature grommets for my doll shoes that I make, I just found some, but none of them have accompanying tools! What’s a “setting die,” and is there anything else that might work instead?
LOVE, LOVE, LOVED our post! After all these years!
Hi, Ruth – so glad you enjoyed this! The setting die is the bottom-sie metal bit that acts as a block of inelastic collision (if you remember you physics). Usually it will have a round groove for the grommet to set in and a post the goes through the hole in the grommet.
Oh, thank you, thank you, THANK YOU for these instructions. I’ve experienced most of this and laughed and laughed. You made my day!
LOL – Glad you enjoyed, Mary! Also glad these things don’t just happen to me. ;)