Miss me? ;)
If you have done up a torso draft with my sneaky mathless draft, you might be wondering how to turn that into a normal block with ease… Maybe even something that’s not a princess line, like a 1 dart bodice block, so you can do some dart manipulation. These instructions should work for any easeless princess line draft, so if you have a moulage or some such lying around, you’re good to go.
Pardon the cheesy Illustrator graphics. My sewing table is currently covered in 2x4s because, um, reasons.
Shall we?


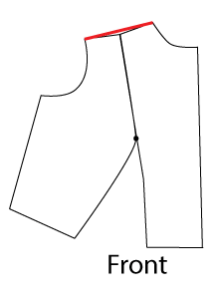
You should be able to match the Fronts pretty exactly above the bust line, and your lines should carry across. (Note for Moulage users: You will have about a 1/8-1/4″ gap between the CF and SF above the bust. Match the Bust point and shoulder; ignore the gap.)
The backs will match across the fullness of the shoulder, but not above nor below. Shoulders are tricksy little beasts like that.


Watch point: If that 7″ dart goes above the level of the bottom of your armscye, or above where your CF and SF pieces join, you will want to lower it. This dart should stay below the shoulder area.
Wait… You said we were making a 1 dart bodice, and we’ve already got two darts goin’ on, there, missa! Fair point. Technically, we’re making a 1 dart front with a two dart back, but that was too long for a post title. ;)

The easiest way to do this is to fold the paper you’re drafting on along the dart legs, and true across the waist and shoulder with a curve (waist) and ruler (shoulder). If you are doing this in Illustrator, like I did, you can compare the line lengths. (I rotated the outside dart leg and lengthened it until it matched the center side, then adjusted the shoulder in a straight line and the waist with a curve. Folding paper is easier and a lot more certain.)


Watch points: The upper part of the armscye should not really change. The side line ends at the original waist line.

Just this once, the front is going to be easier. Oh, and nobody dies.


That wasn’t all too traumatic, was it?
